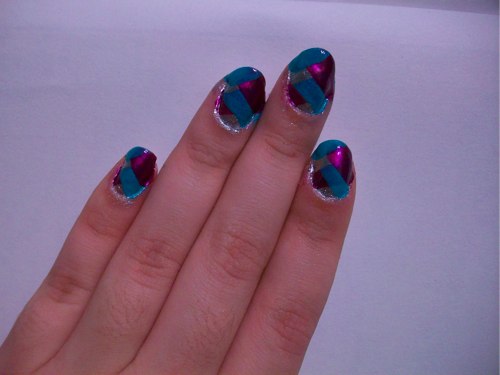
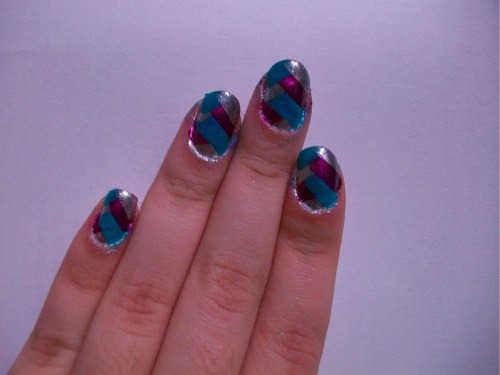
Our nail art aficionado, Victoria, shares how to get the DIY braided nail look in several simple steps below!
Braided hair has always been an easy way to make hair look polished, and now there is a simple way to use nail polish to achieve this eye-catching braided look for your fingers!
What You Need:
- Base coat. Try: Essie All In One Base Multi-Treatment Base Coat.
- Metallic polish. Try: Sally Hansen nail polish in Celeb City.
- Pearlescent polish. Try: CoverGirl nail polish in Grapevine.
- Neon polish. Try: L’Oreal nail polish in Not a Cloud in Sight.
- Top coat. Try: Floss Gloss Gloss.
How to do it:
Apply the base coat. Then apply two coats of the metallic polish. Let your digits dry for about fifteen minutes.
Slowly rotate your finger and apply the pearlescent polish in a diagonal stripe going right.
 Then create a metallic stripe directly below the pearlescent stripe.
 Next, cross a stripe going to the left of the neon polish over the pearlescent color.
 Cross a pearlescent stripe beneath the neon one. Then add another neon stripe over the pearlescent.
 Add a final stripe of the metallic polish below the pearlescent. This design should have three stripes on each side of the nail for the best possible effect.Seal the design with a fast drying top coat to add an element of shine to your nails.
–Victoria Garcia


[…] Daily blogger Victoria Garcia. She shows a tutorial on how to attain the braided nail art look. CHECK OUT THE TUTORIAL and go ahead and give it a […]